Daily Expense Checker in Python Django
The “Daily Expense Checker System in PythonDjango” is a web-based application designed to assist users in managing and monitoring their daily expenses effectively. The system reduces the need for manual tracking by automating the recording and calculating daily expenditures.
| Language Used | Python |
|---|---|
| Framework Used | Django |
| Database | MySQL |
| User Interface Design | HTML, AJAX,JQUERY,JAVASCRIPT |
| Web Browser | Mozilla, Google Chrome, IE8, OPERA |
| IDE | PyCharm |
Project Modules
In the Daily Expense Checker System, we use Python, Django framework and MySQL database. This is the project which keeps records of daily expenses. “Expense Checker System” has one module i.e. user.
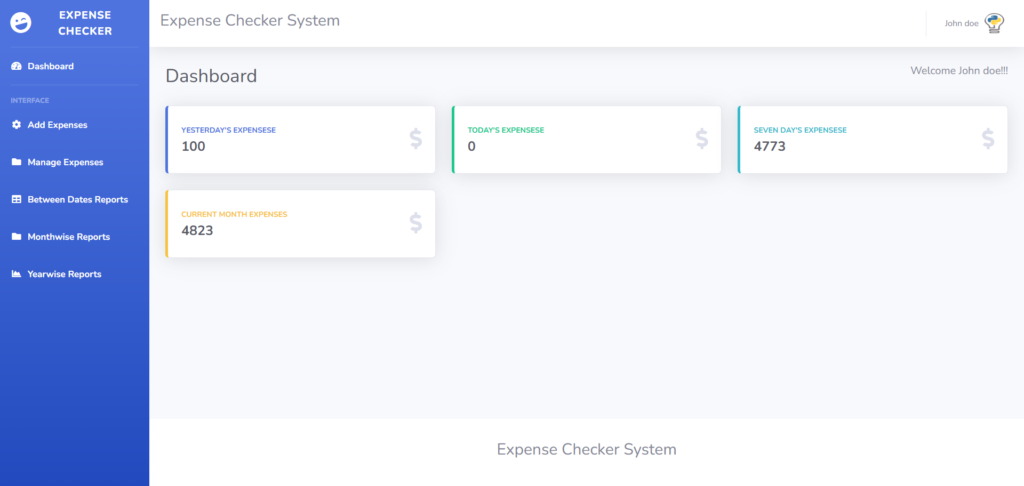
- Dashboard: In this section, user can briefly view expenses on a daily basis, monthly basis and yearly basis.
- Add Expenses: In this section, user can add their expense.
- Manage Expenses: In this section, user can manage the expenses.
- Between Dates Reports: In this section, the user can generate an expense report for two distinct periods, allowing for a comparative analysis of spending over different time frames.
- Month wise Report: In this section, the user can view their expenses on a month-by-month basis. By selecting a specific month from the available options, the system will display all expenses incurred during that period, along with a summarized total for the month.
- Year wise Report: In this section, the user can view their expenses on a year-by-year basis. By selecting a specific year from the available options, the system will display all expenses incurred during that period, along with a summarized total for the year. This feature helps users analyse their yearly spending trends, providing a comprehensive overview of their financial habits and enabling better long-term financial management.
- Profile: In this section, user can update his/her profile.
- Change Password: In this section, user can change his/her passwords
- Logout: Through this button, user can log out.
Project Output Screens
User Signup

User Login

Dashboard
Add Expenses

Manage Expenses

How to run the Project
1. Download the zip file
2. Extract the file, copy dailyexpense folder, and paste it on the desktop
3. Open MySQL Create a database detspythondb then import the SQL File available in the SQL File Folder (For MySQL we used the XAMPP server)
4. Open PyCharm and click on the terminal
5. Navigate the project folder using the cd command
cd project_path
For ex: cd C:\Users\YOURPCNAME\OneDrive\Desktop\dailyexpense\
6. Now Navigate to the expensetracker folder
cd expensetracker
7. Run the Project using the following command
python manage.py runserver
Now click the URL http://127.0.0.1:8000 and the Project will Run
Project Demo